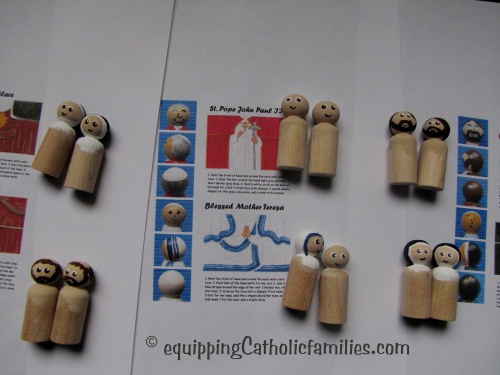
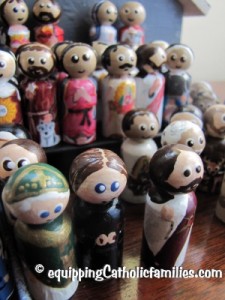
If you’ve been hanging out here at Equipping Catholic Families, you’ll know that I’ve been creating little painted saints for quite some time and have come up with all sorts of ways to play with them! I’ve got quite the gallery of them now between my original painted saints and the Decoupage Saints I made with the help of Catholic Icing’s Printables.
I like working with the 1.75″ pegs. Besides the fact that they. are. adorable., these little pegs are perfect size for play in Lego, the Fisher Price house or castle, Lincoln Logs, or board games like Trouble or Snakes and Ladders, Monopoly, Checkers, the list goes on!
 They even travel well. =)
When I saw that Lacy had released the Nativity Set of Printable Peg Dolls, I once again got out my pegs and paints and decoupaged the whole set, converting her templates to fit my smaller size pegs. You’ll find the Tutorial to Decoupage your own 1.75″ Peg Dolls here including required size of template, where I purchase the little wooden pegs and my own painting tips to make BIG EYE Saints and match up your paint with Lacy’s templates.
I wanted to take advantage of the size of these little pegs and make a Nativity box to store OR display the little painted saints.
I bought a little cardboard box at the dollar store, along with some popsicle sticks. I began painting the inside of the box, planning the little structure with the size of the popsicle sticks in mind.
I made a little roof and columns to fit in the box and glued them in place.
I had the body templates printed (at a reduced size: see Decoupage Tutorial for 1.75″ pegs), cut them out and mod-podged them in place. I always make at least 2 sets at a time so that my little 5 year old Adam can lose play with his own set to his heart’s content. Working on 20 of them at a time…the work goes relatively fast and the first one is dry enough to add paint by the time I work through the group of them.
- I paint the heads with flesh color paint first.
- I cut out and adhere the bodies to each peg.
- I paint the hair or head covering next, adding paint where it continues onto the paper body template.
 I use the other end of my paint brush to make the perfectly round dot eyes, starting with a white base, a smaller dot for the iris and sometimes a tiny dot (with a toothpick) for a highlight.
I used our own in-house power tool, (Homecraft H26-260L 10-Inch Compound Miter Saw by Delta Power Tools)*affiliate link to cut about 1/4″ off the bottom of the pegs for the Little Baby Jesus peg. I then sanded off the rough edge and painted the little guys.
I touched up any little crinkles or gaps in the body templates with paint and added my signature painted saint face style to most of the pegs.
I made a rough little cradle for Baby Jesus out of popsicle sticks (incidentally discovering that I can in fact cut popsicle sticks with scissors!)
I glued the little cradle in place and strategically placed all the figures around it. I hope to seal at least the figures with mod podge…before my 5 year old comes home ready to play!
This will make a great little Nativity set for my college girl in her first apartment.
Want to paint your own saints? Check out my tutorial!

Wooden Painted Saint Tutorial
Do you also have the 1.75″ wooden peg dolls? They’re awesome to use…and fit so many playsets that you already have in the house!
Here’s my Tutorial for Decoupage Saints, converting Catholic Icing’s templates to the smaller size!
Have you seen our new Adjustable Liturgical Calendar Craft Kit? It’s also the perfect hangout for Wooden Painted Saints!













I love the peg dolls of the saints. Great job.
Thanks Tammy! Have you made any painted saints yet? They’re easier than they look to paint and their MAGNETS for kids!